The Resurgence of Canning and a Basic Tutorial
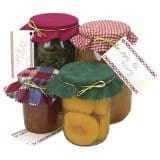 When I was a kid, canning was something my family did to save money. It was something associated, at least to me, with being poor. I learned basic canning from my granny. People have been canning for a very long time. The process was first invented before refrigeration as a way of preserving foods. With the boom of processed pre-prepared foods, canning sort of got left by the wayside. That was until recently. With more and more people trying to live a green lifestyle, canning is gaining popularity again. The new connatation with canning is very chic. Many chefs, cooks, and food bloggers are creating many wonderful recipes for canning. Canning can be a way to gather people together and entertain. Canned goods make perfect gifts too. Its a way of preserving the bounty of harvest season, and enjoying it throughout the year. Canning is also a great way for you to control the quality of ingredients used. You can make things specifically for your own taste, and create whatever your mind can imagine.
The added bonus is you might even save money on your food bill. The only problem is you are probably not going to be saving money by canning if you buy the produce at your local supermarket, especially if its out of season. Be sure to choose canning ingredients that are in season and priced right. Canning from your own garden, cheap produce at a local supermarket, or canning an abundance of produce you just got from picking your own is a way you can really rack up the savings. There is an initial investment when you purchase your jars, however you can keep reusing the jars and their rings over and over again. Just be sure to buy new lids every time. There are just a few other items that you will need for canning, and I am betting that you already have them in your kitchen. Many companies make great little uni-taskers that make the process of canning easier, but you all know how I feel about uni-taskers in my kitchen, not allowed! I know many of you would really like to explore these great little gadgets, so I have picked some great looking canning supplies here in the pictures. All the pictures are linked to amazon, so you can see their price and read reviews.
Before you start your canning process, I would also recommend that you read a more in depth site on the specifics of canning. I have read lots of information on canning throughout the net, and have noticed that much of the information is outdated and not specific. You can find lots of useful information, along with great recipes at the National Center for Home Food Preservation. There is also a great document about the principles of home canning. There are also links to your local extension office for even more information.
I use canning most often for jams and jellies. When I was a kid, we canned lots and lots of tomatoes, in addition to our jams and jellies. Canning is very simple, you just have to be very clean and always aware of possible bacteria and contamination. First you have to sterilize your equipment, then fill the jars with the boiling fruit or vegetable you are canning. When I am putting my cans together, I get going pretty quickly, and the lids pop before I even put them in the water bath to process. When I was a kid, my granny never used a water bath, and everything always turned out perfect. For a long time, I followed her instruction, and also ignored the water bath or pressure cooker for processing. We never got sick. If your careful, that might be ok, but I am here to tell you, don’t do it anymore. It doesn’t take anymore work to throw the jars back in the boiling water for a few minutes, and by doing a processing in boiling water, you are assured that your canned goodies are always safe. This can alleviate any stress when you are processing large amount of jams and jellies for gifts. Who wants to take a chance that you might give 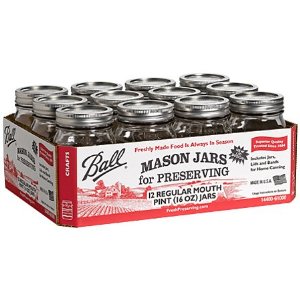 a contaminated jar that could make your friends or family sick? Not me, that’s for sure!
For your canning project, you first need to acquire some jars, lids, and rings. You can find canning jars, along with the lids and rings at your local grocery store. I like to use Mason Jars, simple and economical. However, I would like to try these beautiful French canning jars, but they are a bit expensive. 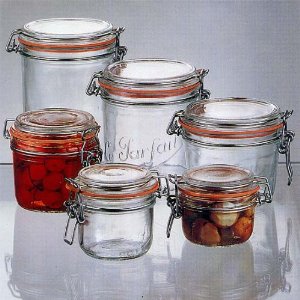
You can clean your old canning jars and reuse them, along with their rings, just make sure that you buy new lids. The rubber in the seal is broken down during the canning process, and is not safe to reuse. Can you use other jars, such as mayonnaise jars you have been emptied and cleaned? No. Some people do, but the glass of these jars is not the same as jars made specifically for canning. It’s also hard to find lids that seal properly, and rings almost never have the same thread pattern.
Next you need a large pot in which you can add enough water to cover the jars. I just use my large soup pot for my smaller jars, and my big pasta pot for large jars. You can buy a pot made specifically for canning, but why if you already have a big pot. I have the same kitchen utensil philosophy as Alton Brown, no uni-taskers allowed! If you purchase a big canning pot, it will have a canning rack to place in the bottom of the pot. 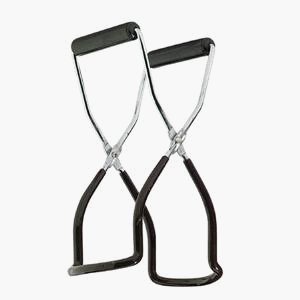 If you are using one of your regular pots, just put a kitchen towel in the bottom of the pot. This will cushion the jars, and prevent them from knocking into one another.
You also need tongs, or a special jar grabber to remove the jars from the water. Make sure if you use tongs, you have a strong set. I get my tongs from Sam’s club back in the restaurant section. They seem to be a little larger and stronger than those in the discount stores.
For acidic foods, you can use a water bath to process your jars. The following method is for a water bath processing. For non acidic foods, like corn or meats, you need to use a pressure cooker to process the jars.
-
- First, wash new jars, lids, and rings in hot soapy water.
- To sterilize, place a dish towel in a sauce pot, and fill with water. Place the jars in the pot in the cold water so that they are submerged, and bring to a boil. Boil over medium heat for 15 minutes. At the same time, boil the lids, rings and the ends of your kitchen tongs in another pot for 15 minutes.
- Note: If you are sterilizing lots of jars, never put a cold jar in hot water, it will probably break. Make sure every time you sterilize jars, you start with cold water again.
- Never ever touch the inside or top of the jar or lid with your bare hands. Use the tongs for the lids, and kitchen towels for the jars.
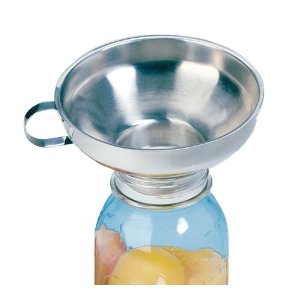
- Fill the jars. You can use a special canning funnel for easy filling, but you don’t have to, I don’t. Be sure not to fill the jars too full. Jars need a head space. Different ingredients require different measurements of head space. I find it very complicated to remember, or go look up the specific head space every time I can, so I have a simple rule. Do not place ingredients past where the threads of the jar start. So, for example, when I put on the ring, the top of the food should just meet where the bottom of the ring is.
- Take another kitchen towel and dip an end in the boiling water and wipe the top of the jar very clean. Be sure to use a clean paper towel, or drop the corner of your clean dish towel in the hot water to sterilize before wiping the jar. Place the lid on with the tongs, being careful not to touch it. Then take the tongs and get a ring. You can place the ring with your hands.
- When all jars are filled, place the filled jars in the saucepan with the kitchen towel placed in the bottom of the pot, and boil over medium heat for 15 minutes -for half pint and pint jars.
- If your altitude is above 1,000 feet, you need to go for 20 minutes, and if your above 6,000 feet, you need to go for 25 minutes.
- Remove and let cool on the counters overnight.
- Be sure to check the jars by pressing the top of the lids to see if they are sealed. A sealed jar will not pop back when pressed.
Canning is as easy as that! Just be conscious of bacteria, keep things clean, and you will have safe and delicious canned goodies. Happy Canning!
