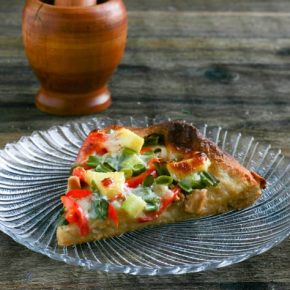
Canadian Bacon, Pineapple, and Banana Pepper Pizza

This is an old favorite of my family. My husband first came up with the idea of ham, pineapple and jalapeno peppers when he was working in a Pizza Hut in high school. He made this pizza for the Sunday lunch buffet. It was a big hit. I convinced his later to change from jalapeno peppers to banana peppers so it wasn’t so spicy. Either way is great though. This was the first time I made the pizza with fresh pineapple. It was so much better, we couldn’t believe it. I will never use can or pre-cut pineapple again. We cook homemade pizza about every other week. We like to come up with different flavor varieties. This is one of our personal favorites. I never tried the homemade crust until I purchased my kitchen aid stand mixer. This makes fast, easy work of kneading the dough.

Yield: Serves 4
Canadian Bacon, Pineapple, and Banana Pepper Pizza
Ingredients:
For the dough:
2 1/2 - 3 1/2 cups bread flour
1 package yeast
1 cup filtered warm water
1/2 teaspoon kosher salt
2 tablespoons olive oil
1 tablespoon honey
For the sauce:
1 can small tomato paste
1 can water
1/4 cup finely chopped onions
2 cloves grated or finely chopped garlic
1/4 teaspoon dried basil
1/4 teaspoon dried oregano
1/4 teaspoon dried parsley
1/4 teaspoon fennel seeds
a dash of crushed red pepper flakes
a splash of beer or wine
Kosher salt
Olive oil
Toppings:
Fresh pineapple chunks
Canadian bacon, chopped in bite-size pieces
Banana peppers, with the juice squeezed out
Italian blend shredded cheese
Directions:
For the dough:
Dissolve the package of yeast in 1 cup of warm water. Add honey and salt and mix to dissolve. Add this mixture to your stand mixer. Add olive oil.
With the paddle attachment, turn the machine on low and start adding the flour (2 1/2 cups, I go ahead and add 3 cups of flour because we have such high humidity in Florida) until just combined.
Switch to the kneading attachment and turn on medium speed. Add a little flour at a time until the dough is well combined and the dough has pulled away from the edges of the bowl, the dough should be very clean. The dough should be sticky, but not so stuck to the bowl when it is being kneaded that it cannot move around.
I have found that making pizza dough has a learning curve, and I had to actually make the dough several times before I knew what the dough was suppose to look and feel like when it is ready. You should continue to knead the dough at medium speed for 10-15 minutes. You have to mix the dough so that the gluten forms well. The dough should be springy. Then you perform the window pane test on the dough.
To do the window pane test, I tear off a small piece of the dough and use my thumb and forefinger of each hand to slowly pull the dough at its four corners. You should be able to stretch the dough, without it tearing, and the dough should be thin enough that light can pass through it. If it tears easily, keep mixing the dough for 2-3 minutes, and test it again.
When the dough is done, spray a large bowl with olive oil, and turn the dough into the bowl. Cover the dough with plastic wrap and let rise. The best way for the dough to rise is long and slow.
If you want to use the dough soon, place it in a warm area for about 30 minutes, or until the dough has doubled in size. If you can wait until tomorrow, place it in the refrigerator and let rise. Be sure to let the dough come to room temperature before working with it. Personally, I let the dough rise at room temperature, about 75 degrees in my house, then punch it down and let it rise again overnight in the fridge.
When your dough has risen, spread a work surface with flour or cornmeal, I always use cornmeal for extra crunch. Depending on what thickness you want your crust, you either split it now or continue to use the whole dough. Using the whole dough will give you a good thickness hand tossed style dough. Splitting the dough will give you a dough that is a this hand tossed style, this is when the dough is stretched to to approximately 15 inches in diameter (the diameter of my pizza stone).
Slowly and gently stretch the dough, turning it about 1/4 - 1/8 turn after each stretch, and continue to stretch until the dough is the size of the pizza stone.
From here, the best way I have found for home cooks is to go ahead and precook this dough before topping it. Commercial pizza ovens are way hotter than our residential ovens, so we cannot use the same baking instructions to get similar results.
At this point I lightly drizzle or spray the top of the dough with olive oil. Then I place the pizza dough on a stone in a 450 degree preheated oven, and bake for 10-15 minutes, or until lightly golden brown.
For the sauce:
Preheat a small skillet or sauce pan. Drizzle with olive oil. Add onions and kosher salt, saute until tender. Add garlic, tomato paste and herbs, fennel, and red pepper.
Saute until fragrant, about 2-3 minutes. Add water and and a splash of beer or wine. The alcohol will cook off, and you need the alcohol to fully develop the flavor of the tomato. Add a bit more kosher salt and simmer for at least 15 minutes, or until the desired consistency.
For assembly:
After precooking your pizza dough at 450 degrees in a preheated oven for 10-15 minutes, remove from the oven and top with the pizza sauce.
Then place approximately 2/3 of the the cheese you are going to use on top of the sauce. Then place the Canadian bacon, pineapples, and banana peppers on the pizza.
Then place the remaining 1/3 of the cheese on top of the pizza. Bake the pizza in the 450 degree preheated oven for approximately 10-15 more minutes, or until golden brown. Enjoy!


